How-To Guides
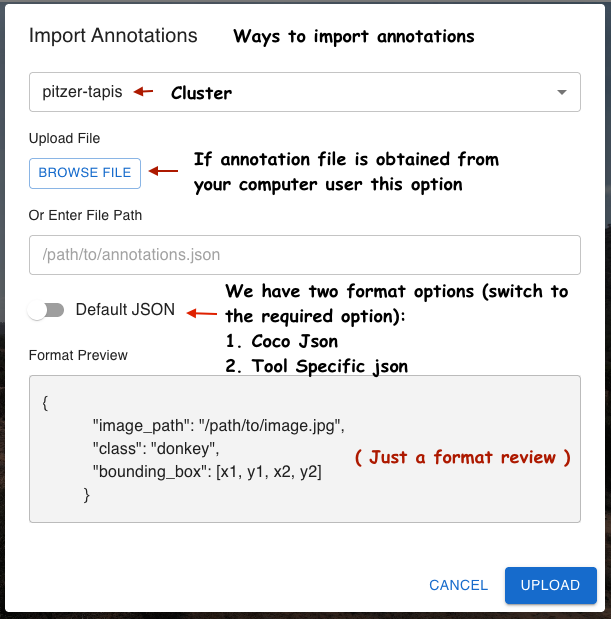
How to Import Existing Annotations
- In the Image Annotator (Step 1), click Import Annotations.
- Choose Browse to upload a local file, or enter a remote Tapis filesystem path.
- Select the file format (COCO JSON or Default JSON) using the Format Switch.
How to Save and Download Annotations
Click Save Annotations to write to a remote Tapis path, or Download to export to your local machine.
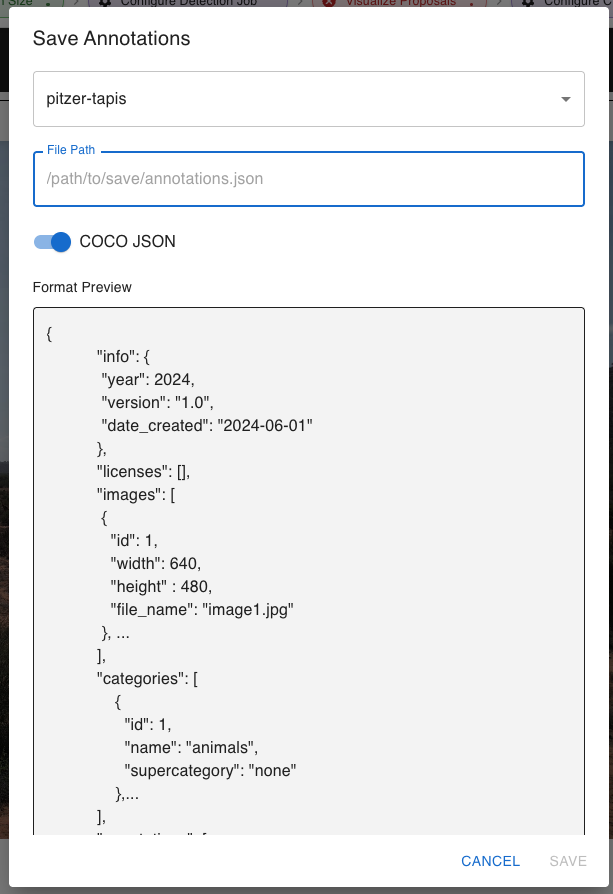
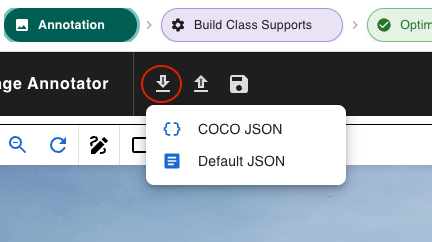
Both options support COCO JSON and Default JSON formats via the Format Switch.
How to Resume a Pipeline
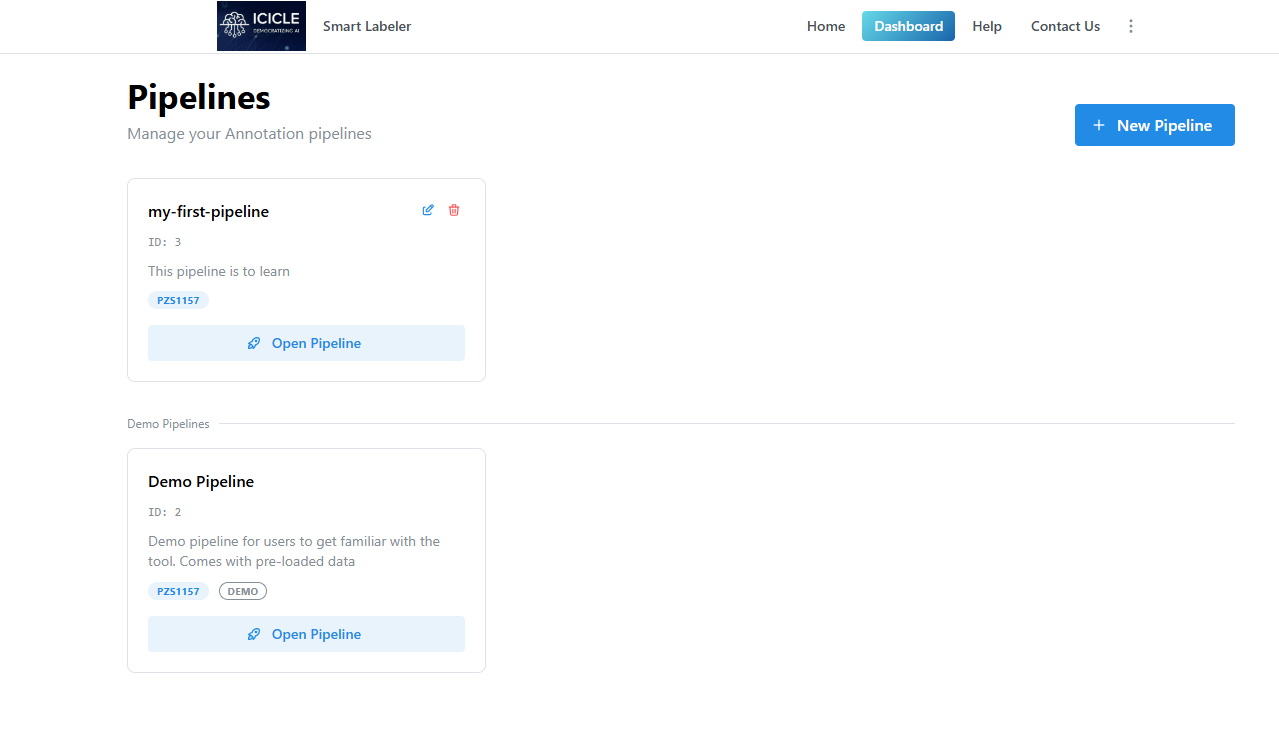
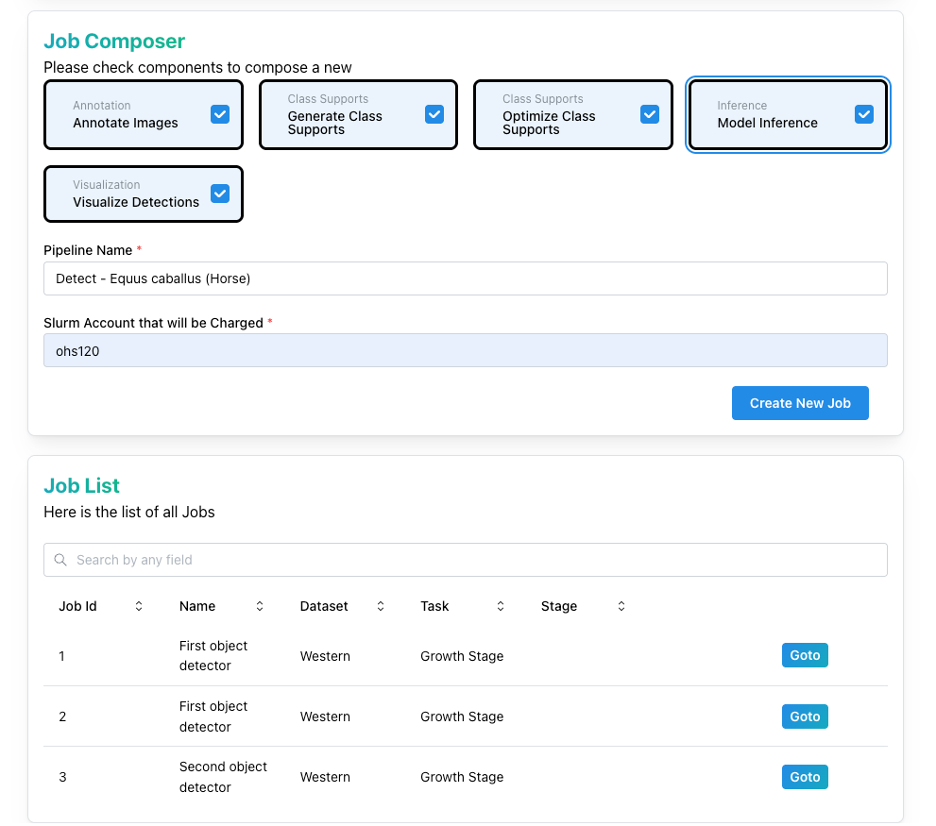
From the Dashboard, use the search or filter controls to locate your pipeline. Click Goto to re-enter at the last completed step.
How to Check Job Status and Logs
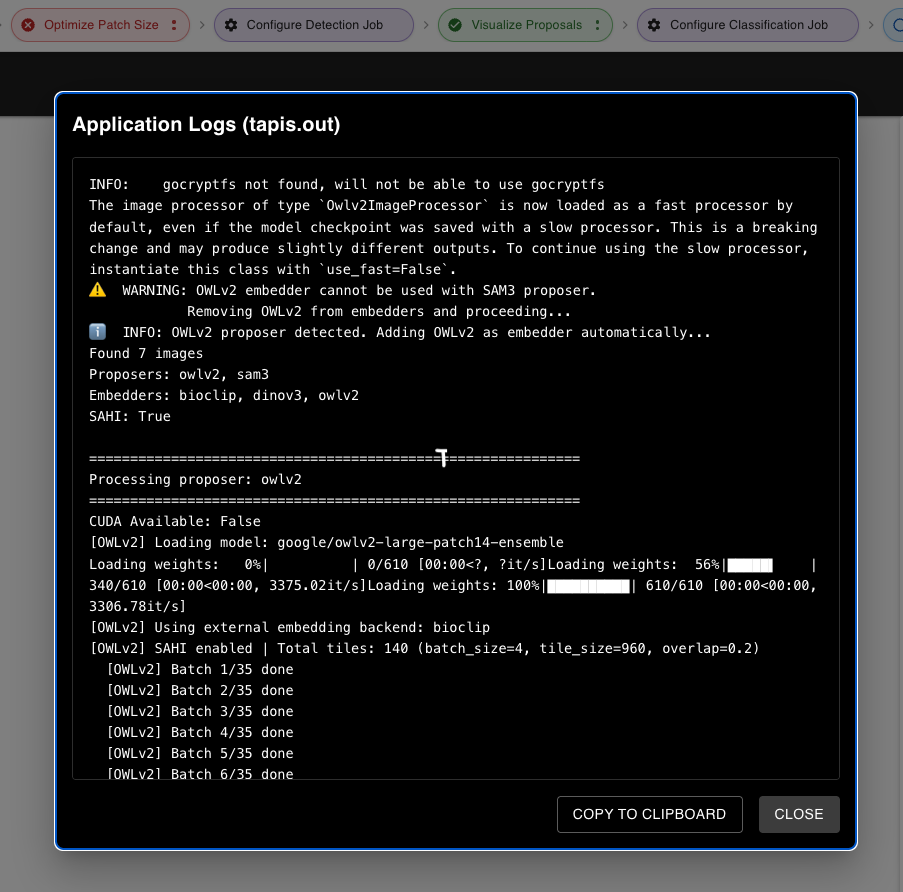
The pipeline status bar appears at the top of every step. Right-click any step chip to open the context menu.

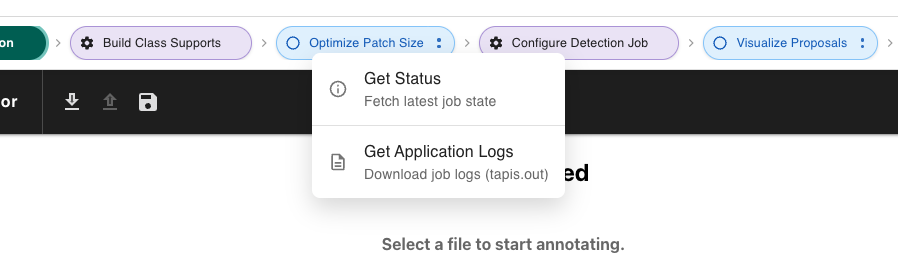
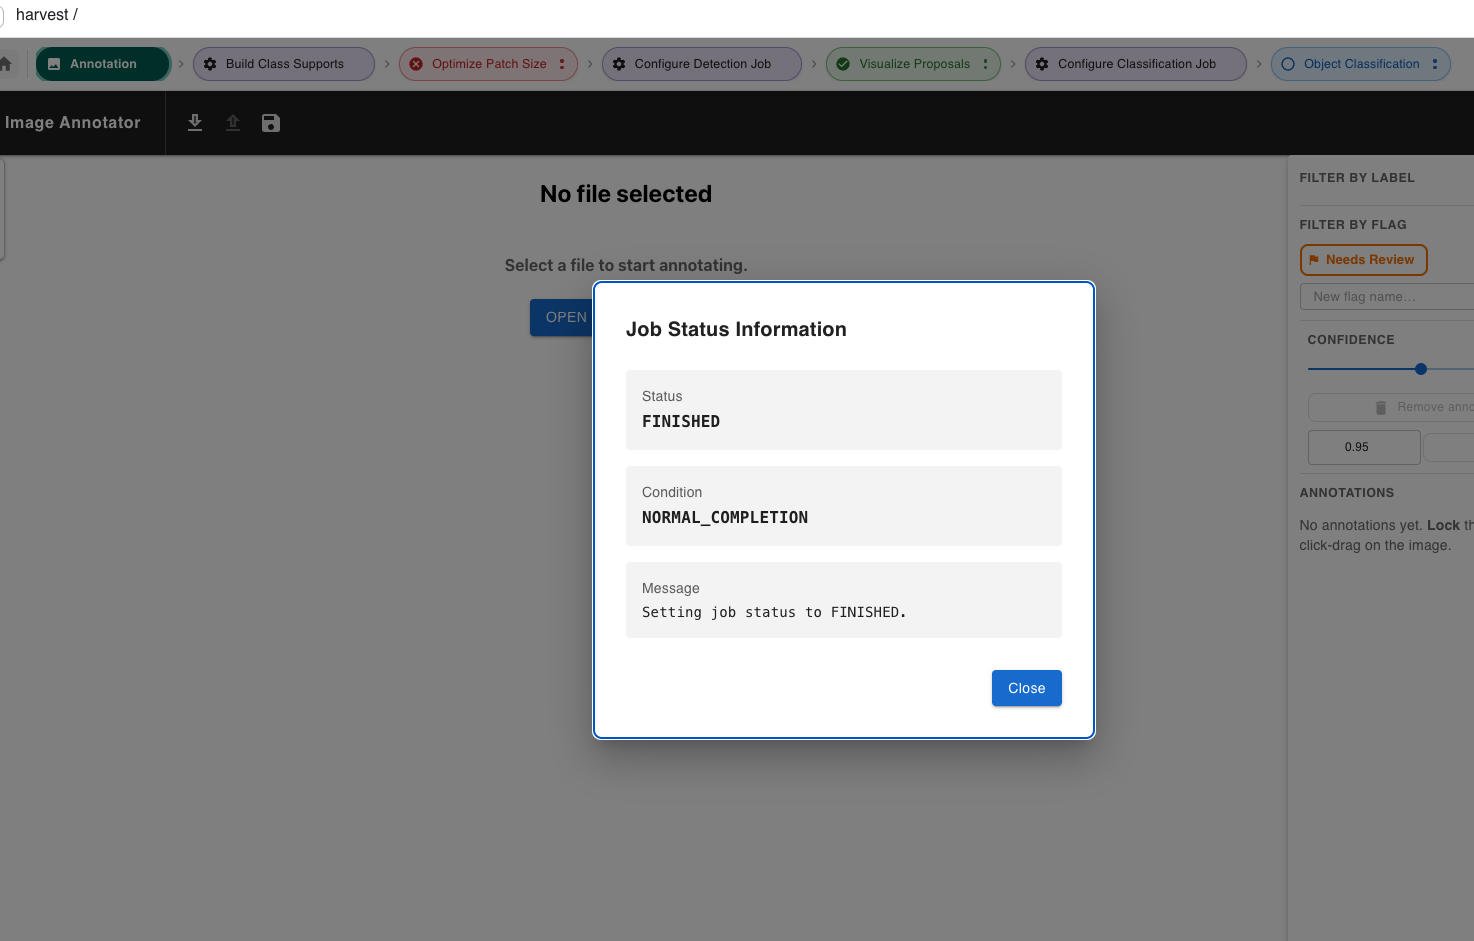
- Select Get Status to poll the Tapis job and view status, condition, and last message.
- Select Get Tapis Logs to fetch and display
tapisjob.outfrom the HPC run.
How to Use SAHI Tiling for Small Objects
Enable SAHI when your images are large and objects are small (e.g., aerial imagery, microscopy).
- In Step 2 or Step 4, toggle the SAHI switch.
- Set a Tile Size (pixels) — a good starting point is
960. - Set an Overlap Ratio (e.g.
0.25) so adjacent tiles share context. - Submit as normal. Inference runs on each tile and results are merged with NMS.
How to Set Up Hugging Face Access
Some models used by Smart Labeler (SAM3, DINOv3) are gated on Hugging Face and require an account, approved access, and a personal token. Complete all four steps in order.
Step 1 — Create a Hugging Face Account
Go to huggingface.co and click Sign Up. Enter your email, choose a username and password, and verify your email address. Complete your profile (name, organization if applicable).
Tip: Use a professional or institutional email address — it improves your chances of approval for gated models. If you already have an account, skip to Step 2.
Step 2 — Request Access to SAM3 and DINOv3
SAM3 and DINOv3 are gated models hosted by Meta. You must agree to their usage terms before you can use them. Approval for one model does not grant access to the other — request each separately.
SAM3
- Open the SAM3 model page: huggingface.co/facebook/sam3
- Click Request Access and fill in your details (first name, last name, date of birth, country, affiliation, job title).
- Accept the Meta Privacy Policy terms and click Submit.
- You will see a confirmation that your request is pending review.
- Once approved, the model page shows: "Gated model — You have been granted access to this model."
DINOv3
- Open the DINOv3 model page: huggingface.co/facebook/dinov3-vitl16-pretrain-lvd1689m
- Repeat the same access request process as for SAM3.
Tip: You will receive an email when approved. Check your spam folder if you don't see it after 24 hours.
Step 3 — Generate a Hugging Face Access Token
Once your access requests are approved, generate an API token so Smart Labeler can authenticate model downloads on your behalf.
- Navigate to your token settings: huggingface.co/settings/tokens
- Click + Create new token.
- Set the Token Type to Read and give it a descriptive name (e.g.,
ICICLE-TapisAccess). - Click Create token and copy the value immediately — it is only shown once.
Warning: Treat your token like a password. Do not share it or commit it to a repository. If you lose it, revoke it and generate a new one from the same settings page.
Step 4 — Add the Token in ICICLE / Tapis
With your token ready, add it to your ICICLE/Tapis credentials so it can be injected securely into HPC jobs.
- Log in to your ICICLE/Tapis account.
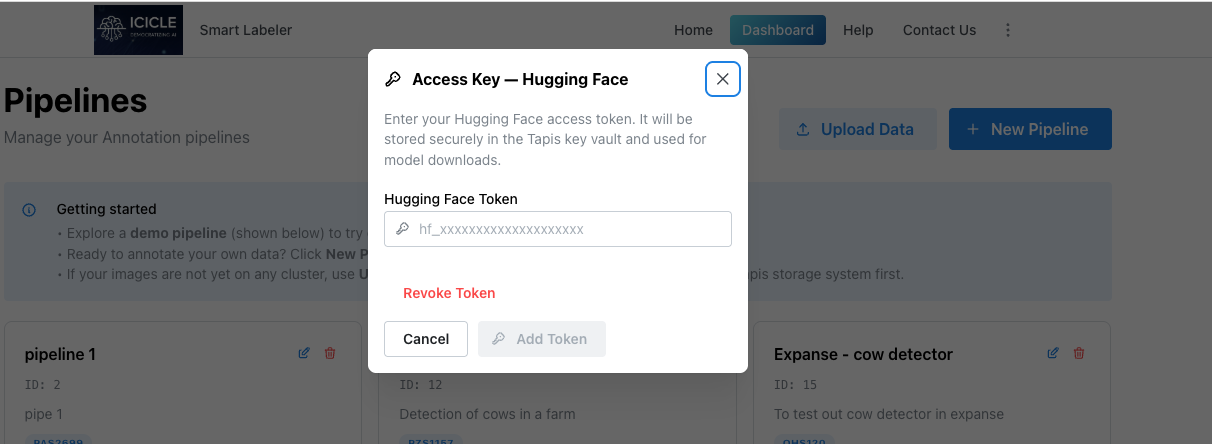
- Navigate to the Settings section indicated by 3 dots on the dashboard.
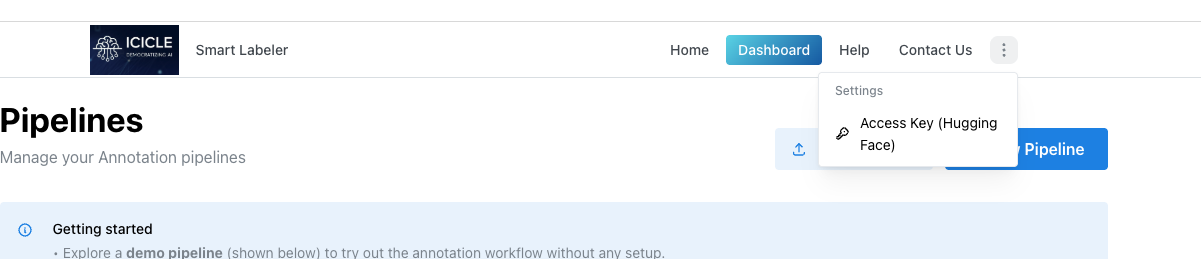
- Click on Access Key.
- Paste your token and save.
- Click on Revoke token to permanently delete the token.